After living in Japan for six years with only an itty-bitty concrete front porch, a good-sized backyard was one of our requirements when we were searching for a new house.
We wanted a private place to entertain — which led to our DIY pergola — and a fenced yard to conveniently let Kona out to do her business and play. She loves to chase the ball.
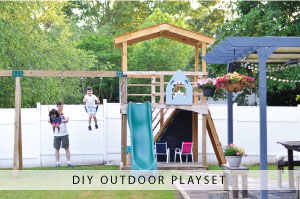
It was also to provide a safe, enclosed space for our kids to play. I think children thrive when they play outdoors — swinging to their hearts’ content, running in the green grass, feeling the sun on their skin. That’s how I remember my childhood. My littles are still quite young, so they also require a watchful eye. A playground in our own backyard was a perfect solution.
We priced out a few pre-fab playsets and didn’t see one for less than a grand after taxes. And that was just for parts!
We also didn’t see one we couldn’t build ourselves, and so, in our usual fashion, we set out to DIY a better playset for a lot less.
Here’s what we did:
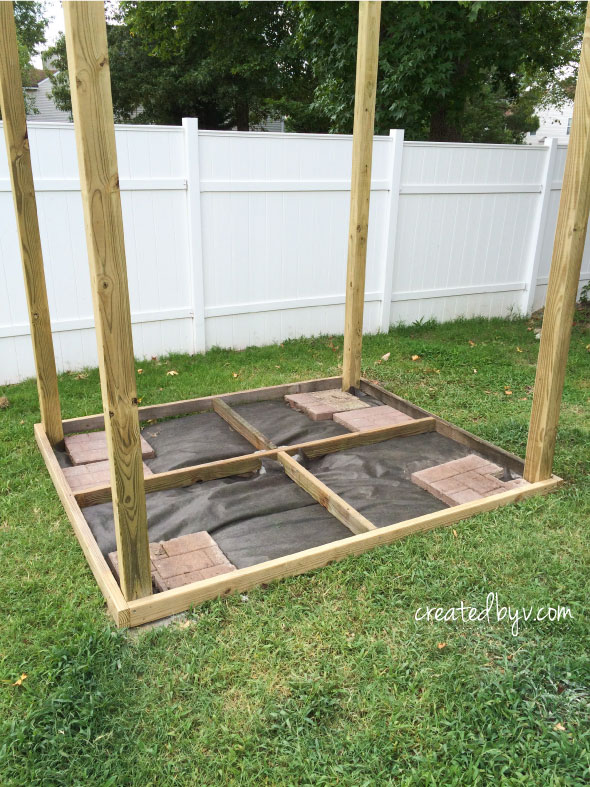
1. We started by digging holes for the posts and cementing them in for the frame. (All of this was completed while I was in Montreal for my girls weekend.) Let me just say this sucker’s not popping out of the ground when you’re swinging high like those flimsy metal swing sets of my day!
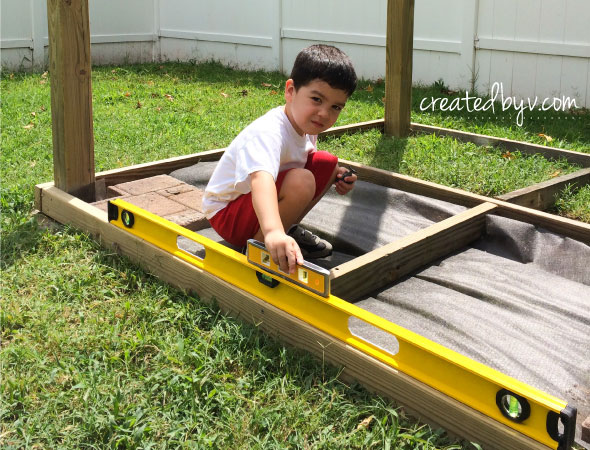
My son made sure everything was level and plumb. He’s really serious about his work.
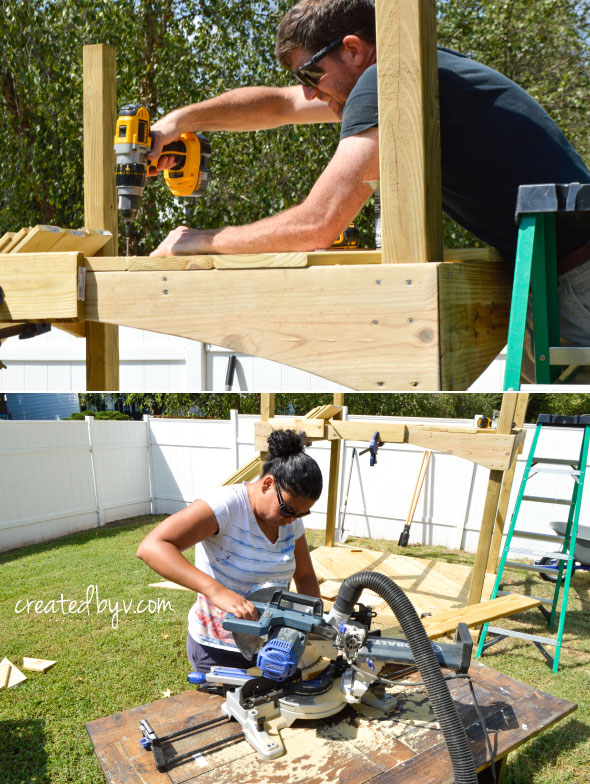
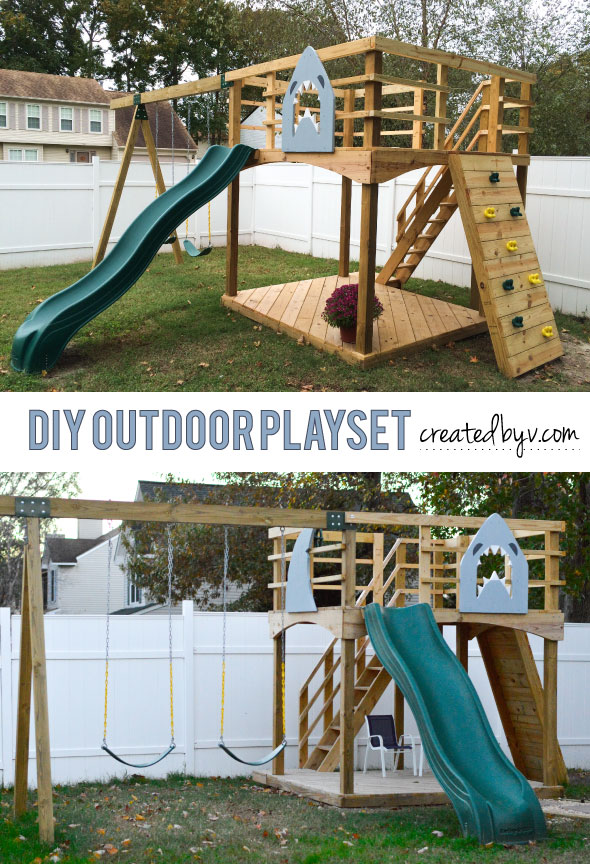
2. Using pressure treated deck boards, we constructed two platforms. I wanted a play area they wouldn’t outgrow too quickly, and so the upper deck is set to fit a 5-foot high slide. (They really go flying down that thing!) We cut the planks at 45-degree angles and secured them with wood screws.
I think the diagonal decking and archways are nice touches that may not have come with a pre-fab set.
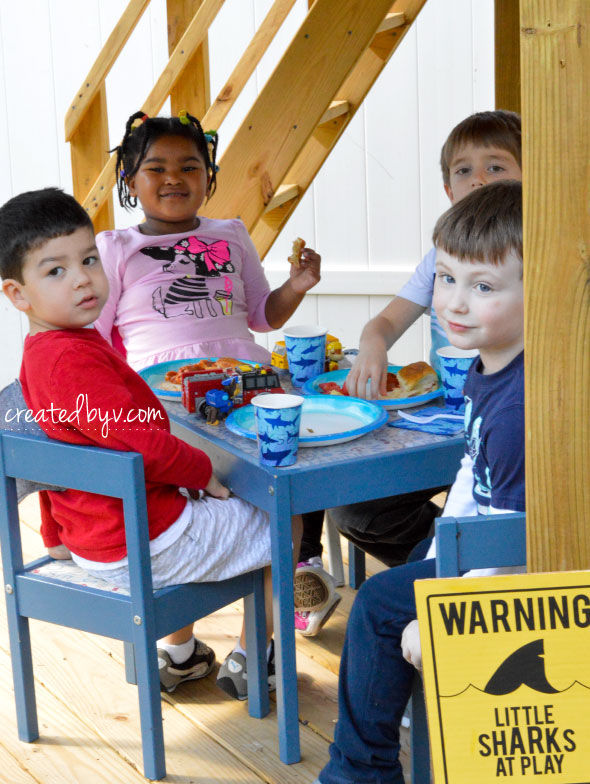
And now the kids have a place to entertain, too!
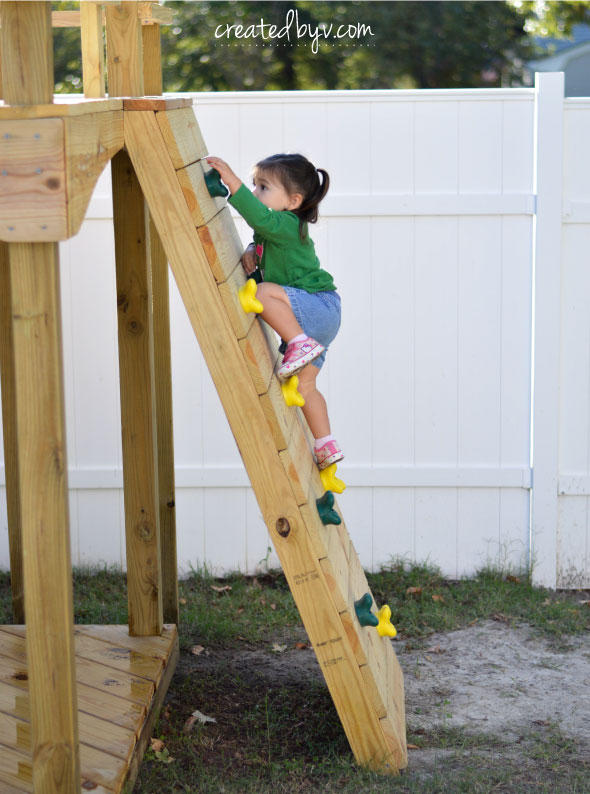
3. We added a rock wall and a set of stairs along the back as two additional means of egress in the unlikely event of a fire. But the slide is still the fastest (and most fun) way off!
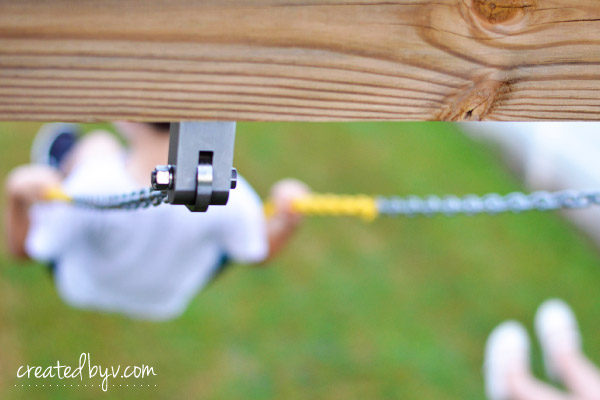
4. We ordered heavy-duty swings, climbing rocks and a steering wheel from Amazon. We bought the slide from Home Depot. These accessories were the most expensive — and essential — parts of the playset. Future plans to up the fun factor include a standing skateboard swing, chalkboard panel and picnic table.
All in all, we saved over $1,000 for a comparable pre-fab set, and we got to customize it to our liking. My son has affectionally named it the Colossus Octopod Shark from his obsession with sharks (the documentary series, Air Jaws, in particular) and the cartoon, Octonauts. We added a few woodwork pieces to capture this name.
Now on those days when we’ve stayed indoors watching too much TV or the kids get bored, I can easily say to them, “Let’s go play!”
Those three words are always greeted with smiles and cheers and quick feet out the door, and I don’t have to load up the car or leave the house. So thankful. This surely beats any show on television any day!
For more information about our DIY Outdoor Playset, check out these posts.
DIY Outdoor Playset // A Year Later
DIY Outdoor Playset // Materials & Tools List
Thanks for reading! — v.







Your play set looks fun, good inspiration for spring. how tall are the posts for the roof and how are they attached to the main platform or top railing.
Do you have videos on the process. I have questions on the 2nd deck. What is the floor sitting on and how is it attached?
my husband is interested in attempting a similar project.. it looks absolutely amazing! do you mind sharing your material’s list? Also, any special angles you had to cut your wood? Thanks so much for inspiring us to attempt this DIY :)
Hi Christina! Yes, here’s the post for the materials list. What a fun family project to do this spring — please keep us posted and happy building!
You guys did a super job!!! I can see in both of their faces how much they like it. I also interested to do this for my kids. Hope so they will also love these. Thanks for the sharing such a informative also useful article.
Thanks, Daniel! It’s holding up quite well, and I’m thankful it’s right there for my kids who are now out of school for the summer. I hope you’ll have as much or more success with yours!
I searched Pinterest for plans to do my own playset and yours was the best I found. I used your basic guideline and modified it when needed. It was a great help and my boys love their new playset. Thanks. If I could attach a pic to this post I’d show you my results but I can’t figure out how to do that here!
Thank you so much, Kevin, for sharing this good news! I’d love to see a pic — you can post them to the Facebook page or email me directly. I hope your boys enjoy their new playset for years and years to come!
what’s the dimensions of the deck on the bottom? like how wide and deep is the main section of play set?
I do realize this is an older comment but I would love to see someone else’s version of this playset. Looking to build one and for some reason I just keep coming back to this one.
I have four boys that would love this. Have you posted a materials list somewhere?
That’s great, Nicole! Yes, please check out this post for a materials list. Thanks for reading!
This is exactly what I have beeen looking for.
Do you have to (or recommend)cementing the posts? I would like for our playhset to be noble
In case we want to move it.
Hi Jackie: We recommend cementing the posts for maximum rigidity, but you don’t have to. We plan for this playset to stay put –even in hurricane winds — and with the swing movement and adult weight on the set, we thought it safest to concrete the posts. I hope this helps and good luck in your building!
Thanks, everyone, for your interest in this project! Please check out the additions we’ve made and the materials and tools list. Happy building!
O my goodness… may I please get the materials list?
Wow I just realized this post was from 2017?Hope I get get a list even better a plan!!! We are going to attempt this starting today!!
Hi Annie! We built our playset in the fall of 2015. It was our original intention to simply share our little DIY project, but so many folks asked for a materials list that we went back and calculated one, which we will publish alongside the updates we made to the playset. Happy building on your set, Annie — would love to see pics!
Cant wait to see your get materials list! would love for my husband and I to build This for our 4 kids! Awesome job!
Thanks, Tiffany! My husband just returned from an underway so we should have it wrapped up shortly. Thanks for your interest!
How much did this cost? Also, could you put a supply list thanks so much. Nice work!! ?
Thanks, Tamiya! This stage cost about $650. Check out the additions we made and the materials and tools list. Thanks again!
Could u please email me a copy of ur materials list and plans/photos if u have them?
chad.a.merritt@gmail.com
This looks amazing! Do you have a materials list and plans blog? I could have missed it. I love it!
Can’t wait to see the material list! We are wanting to build this for our little boy by December. Y’all did a great job!! Thanks for sharing!
Any luck on the materials list?
Working to finish it up and publish asap, Chad! Thanks for your interest!
Really nice! Congrats on a job well done! I am interested in building this for my 2 boys. Do you all have the Materials list and plans? Thank you.
Thanks, John! We should have the materials list ready shortly. I’ll email when they are available.
Chad, we should have the materials list ready shortly. I’ll email you when it becomes available. Thanks!
If you don’t mind my asking, what was the list of materials you guys used to build the above? It looks wonderful and apropos for my small-ish backyard…?
Great question, Diana! Would you kindly give me a bit to post a resource list? I’m happy to help with any questions for your build. It is wonderful to have in your own backyard!
Outstanding! Such a great playground they have!
Thank you, Jeannie! It was a labor of love that reaps many benefits. :)
GREAT JOB!!!! Completely fun, gorgeous and so well built. I laughed at those crazy metal swing sets I/we had growing up. Hot as the hinges of hades in the summer, too!
Thank you, Christina! Oh my goodness, yes! I totally forgot how hot they could get in the summer — singe your fingers! LOL
Hi there – playset looks great. Thinking of doing something similiar as a DIY. You are so right – the sets are soo expensive to buy at Home Depot etc.
Just wondering if you could share some more detail on the top floor, railing, climbing wall and stairs? Hard to get an idea from the pictures.
Great job and thanks for sharing the story!
Thank you, Mason! Sure thing. I’m actually in the process of posting an update and FAQ on the playset so I can include more detail on those items you mentioned in that post. Feel free to shoot me an email if there’s something specific you are questioning. Be sure to subscribe so you don’t miss the post! Thanks again for reading and I hope you’ll share with me how your building goes!
I love this! How tall are the posts from the ground to the top?
Hi Cara: Thank you! The posts are 10 feet tall with about 2 feet cemented into the ground, so the posts are about 8 feet above ground.
What are the measurements for the base? And are those 4×4’s
Hi Ken: The base measures 6′ wide by 5′ deep between the posts. Yes, we used pressure treated 4x4s for the posts.
We are working on a few more upgrades and will share them on here shortly! Be sure to subscribe so you don’t miss the post! Thanks for reading, Ken!
About how much room are u using for your playground? We are working on building one ourselfs but not sure if we have enough room. Soecially dlthe swings wouldnt want the kids to hit the wall.
Hi Ruby: It’s about 15 feet wide, taking up a small corner of our backyard. The swings hang from a beam that is about 8 feet off the ground and sit about 10 feet from the fence when still. I hope this helps with your planning — let me know if you have any other questions. Good luck with your building!
Hi, I was just wondering if you would be so kind to share how much the total cost of this project was! It turned out great, thanks for sharing!
Hi Samantha: I’m happy to share any info, especially if it helps you out! Our DIY playset cost $650 for all the pressure-treated wood, hardware, concrete, weed barrier and accessories — the slide, swings, rocks and wheel. We are working on a few more upgrades and will share them on here shortly! Be sure to subscribe so you don’t miss the post! Thanks, Samantha!
Where did you find the 4×6 bracket that connects to the 4×4 post? I’m in the market for 2 of them asap…
Hi Rob: My husband made the brackets for our playset. He does metal fabrication for a living and can make similar brackets for your set. If you’re interested, just send me an email. Swing-n-Slide also sells brackets and braces online. Thanks for reading about our project and happy building on yours!
Amazing job! I would love for my family to have something like this. Would you mind sharing the measurements if u have them….I want to see if my hubby and brother can build one because our $500 Walmart wooden one just fell apart on us in 3 years ; ( needing a last one asap. Also what type of wood did you guys use? How is it holding up so far?
Thank you, Janelle! I am happy to share any info that would be helpful to you! We used pressure-treated wood for everything. This wood for the posts and the swing A-frame and these boards for the decks. All of the posts were dug into the ground about 2′ and concreted in place. The top deck starts at 5′ to coincide with the slide, and the railings are 3′ high so the swings hang from a 4″x 6″x 12′ beam at about 8′ off the ground. We used 2x4s and deck wood for consistency on the rock wall and stairs, and ripped 2x4s in half to make railings. So far, the set is holding up perfectly!
Please feel free to add a comment or send an email with any additional questions you may have. I wish you the best in building your new set! It is so convenient to have one in your own backyard, right?!
You guys did a super job!!! I can see in both of their faces how much they like it!!!
Thanks! Baby-chan is still warming up to the slide, but they both LOVE the swings!
and once the kids have outgrown the playset, it becomes the adults’ hot tub deck with perhaps a champagne cooler.
… put the fish in the cooler! :)
You guys did a great job. I bet the kids were so excited. They are really growing up to become a part of a good family. Love it!
Thank you! We still make trips to the “big” playgrounds, but it’s nice to let them out back to play whenever we want. I’m glad we can keep you involved with the kids, house and other stuff through this blog, too!