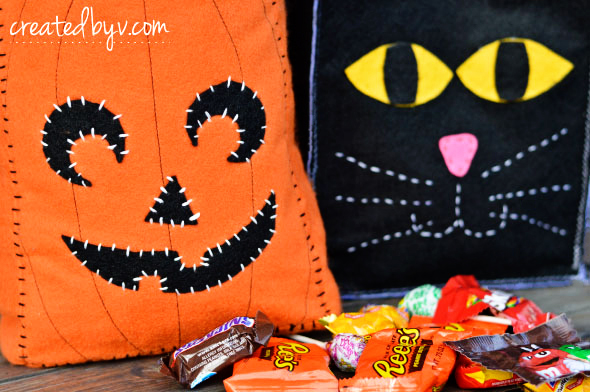
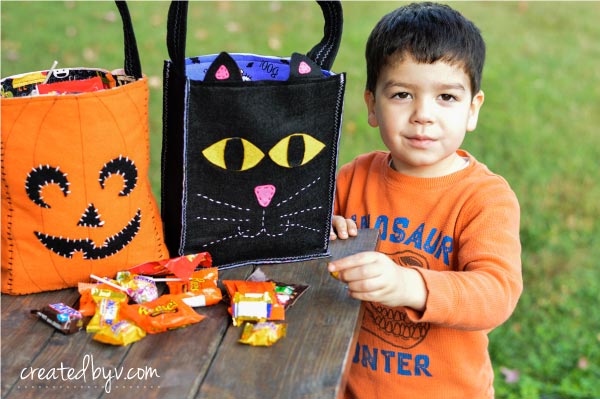
Last year I made my kids their own Halloween treat bag as the ultimate accessory to their costume. They loved them!
When I pulled the treat bags out of the Halloween storage box this year, they were so excited to see them again that I thought I’d share a quick tutorial so you could surprise your kids this Halloween, too.
I am a beginner when it comes to sewing, so rest assured that these bags are simple to make in a short amount of time. Let’s get started!
DIY Halloween Trick-or-Treat Bags
{tutorial}
Pumpkin Supplies
• felt: orange and black
• thread: white and black/brown
• embroidery floss: white and black/brown
• fun fabric for lining
• heavy fusible interfacing
Black Cat Supplies
• felt: black, yellow and pink
• thread: white
• embroidery floss: white and pink/red
• fun fabric for lining
• heavy fusible interfacing
Tools
• glue gun
• sewing machine
• scissors
• ruler
• needle
{STEP 1} CUT FELT, FABRIC AND INTERFACING PIECES.
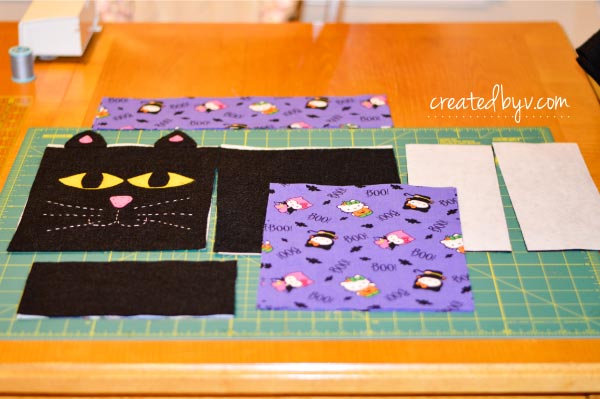
These bags are about the size of a medium gift bag and hold plenty of candy. The measurements include a 1/2″ seam allowance. Feel free to adjust the size to your personal preference.
Cut the felt, liner fabric and interfacing to the following dimensions (width x height):
A. Front/Back: 7-1/2″ x 9-1/2″
B. Sides: 4″ x 9-1/2″
C. Bottom: 7-1/2″ x 4″
D. Handle: 18″ x 3″ (felt only)
{STEP 2} CUT AND ASSEMBLE FACES.
To make things even easier for you, here’s a free printable pattern for the pumpkin and black cat faces.
- Cut ears, eyes and nose pieces from black, yellow and pink felt.
- Place eyes and nose with a spot of glue.
- Hand sew whiskers and mouth with white embroidery floss.
- Outline the nose and inside of each ear with matching embroidery floss.
- Set the ears aside; they will be sewn on when the bag is assembled.
For the pumpkin:
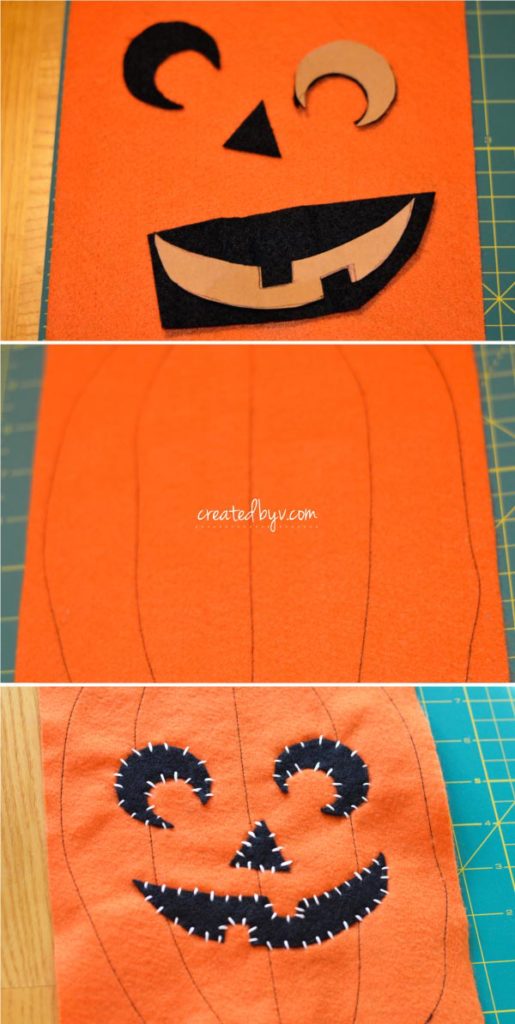
- Cut eyes, nose and mouth from black felt.
- Draw five segments with a vanishing fabric marker on the front piece. Using a sewing machine, sew a straight stitch along the lines.
- Place eyes, nose and mouth with a bit of glue. Sew on with white embroidery floss by hand.
{STEP 3} ASSEMBLE BAG.
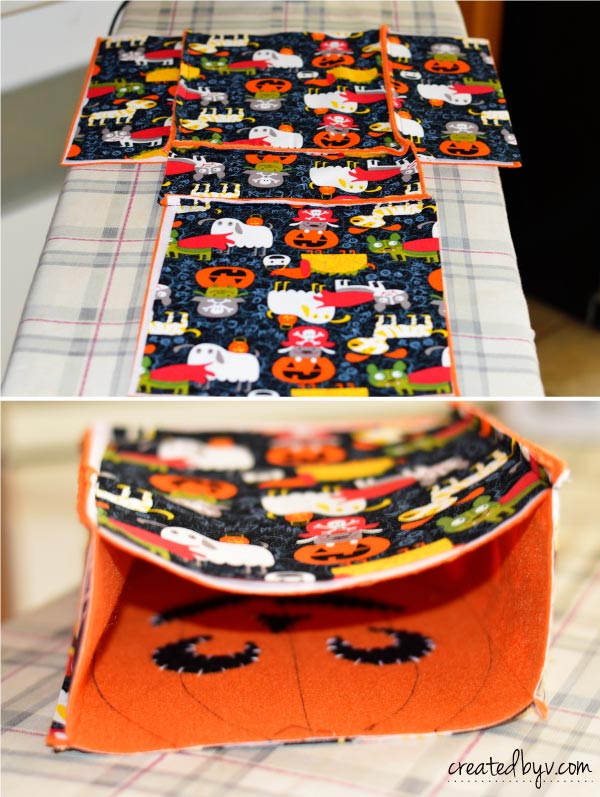
Iron the interfacing pieces onto the felt pieces. The interfacing stiffens the felt, making the bag sturdier overall. Top with liner fabric, pinning in place if necessary.
Using a sewing machine, sew the front piece (A) to the bottom (C). Then sew the back piece (A) onto the other side of the bottom (C). Next, sew the sides (B) onto either side of the front (A). Iron all your seams down for a smooth finish and sew the bag up by connecting the sides (B) to the back piece (A).
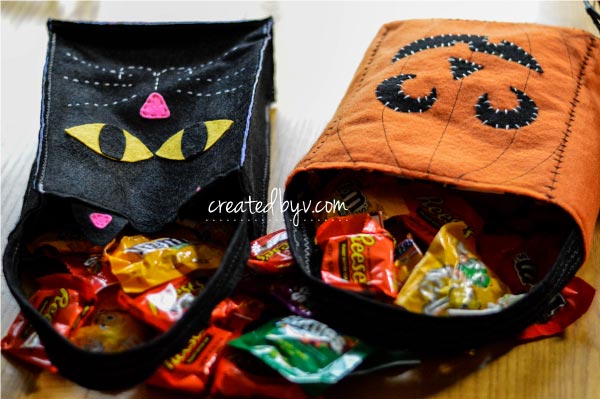
I used a basic straight stitch for the pumpkin, sewing the insides together like a traditional tote bag. I accented the front edges with embroidery floss to mimic blanket stitches.
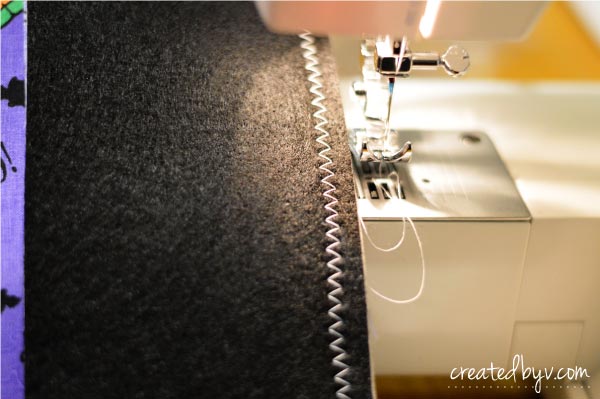
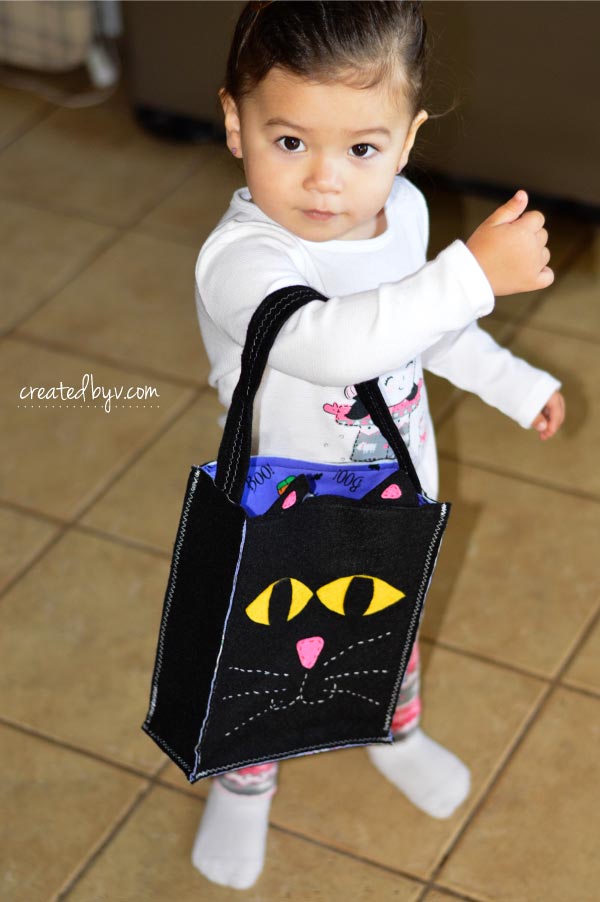
For the cat, I sewed the outer sides together using a zig-zag stitch so the seams are visible on the outside of the bag.
{STEP 4} ASSEMBLE AND ATTACH HANDLE.
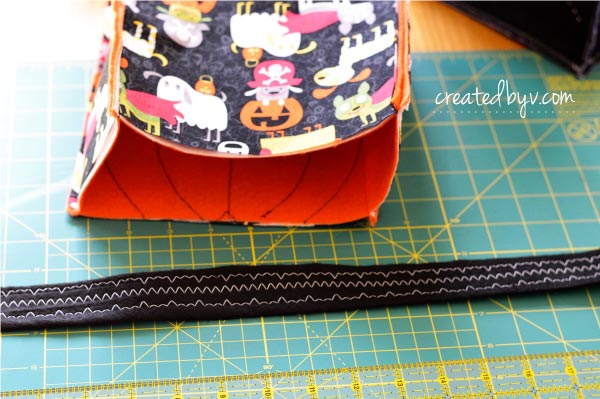
Fold the handle piece in half length-wise and iron. Sew the open end closed with matching thread about a 1/4″ from the edge using a straight stitch on the sewing machine. Fortify and embellish the strap with different zig-zag stitches in white thread.
Place each end of the handle between the interfacing and liner layers about an 1″ below the top edge and pin. Use the same method to place the cat’s ears. Secure in place by sewing all the way around the top of the bag — about a 1/4″ from the edge — double stitching over the handles.
{STEP 5} FILL WITH CANDY!
HAVE A SAFE AND HAPPY HALLOWEEN! — v.
Follow my Pinterest board for more Halloween inspiration.








Cute idea! Cute kids! Gonna make your bags for Halloween too.
Thanks for idea.
Linda
Thanks, Linda! They are a fun addition to the holiday. Enjoy!