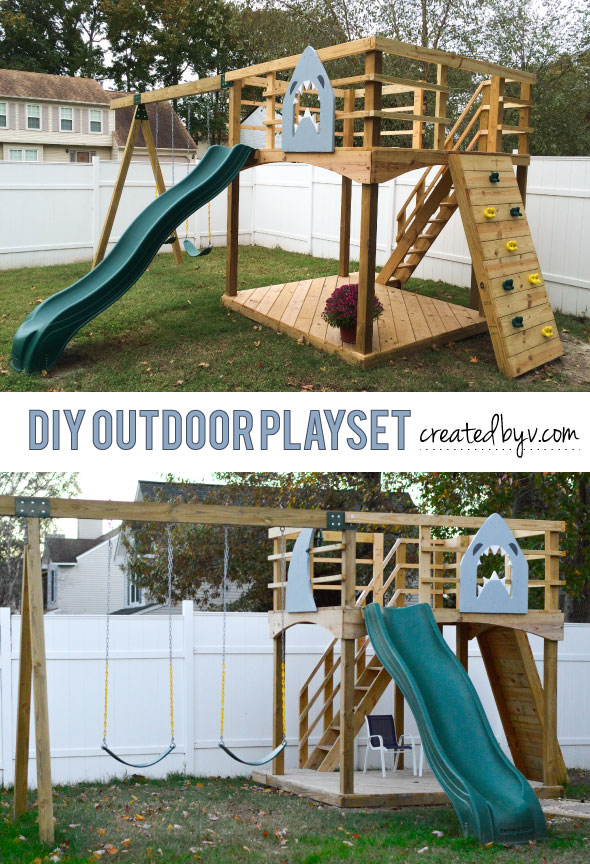
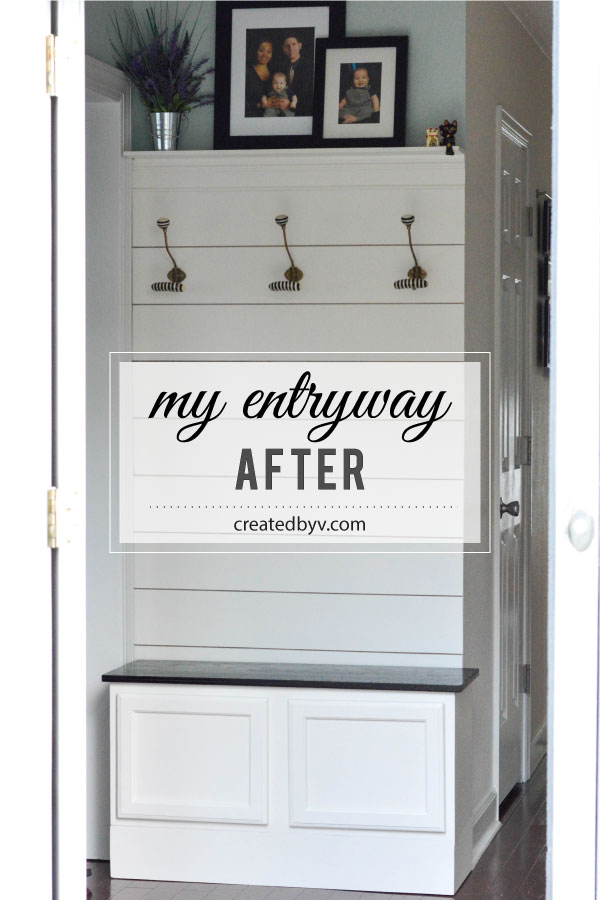
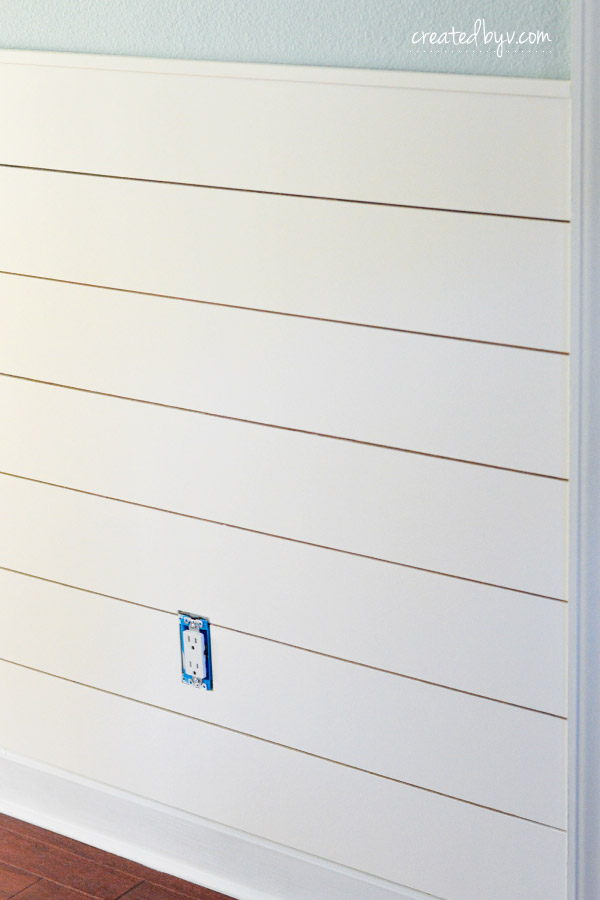
Shiplap, the design craze sweeping the nation made popular by Chip & Joanna Gaines. While there are a ton of tutorials out there, the purpose of blogging is to share my experience, and so today I am showing you how I added shiplap to the walls of our entryway.
Please note that I am demonstrating a wall planking technique that gives all the character without all the work of authentic shiplap. I think you’ll find this method is an easy and affordable way to add charm to your home, too!
Tools & Materials
- planks: 1/2″ blondewood plywood sheet
- entryway trim: 3 1/2″ chair rail moulding
- hallway trim: 1-1/16 x 1-1/16″ corner guards
- electrical box extender
- 4 nickels or 1/8″ tile spacers
- wood filler
- paint / primer
- sander / sandpaper
- miter saw / jigsaw
- pneumatic nail gun with 1 1/2″ brads
- stud finder
- level
- hand drill / bit
1. Prep the space.
I left my first wall as is — sample paint swatches, pencil marks and all — assuming the planks would cover it all up. Well, you know what they say about “ass-u-ming!”
I quickly learned the flaws were quite visible with a 1/8″ gap. I later went back with a small craft brush to cover up the most glaring marks, but learn from my mistake and give your walls a quick coat or two of primer to prepare a clean canvas for the planks.
2. Find and mark wall studs.
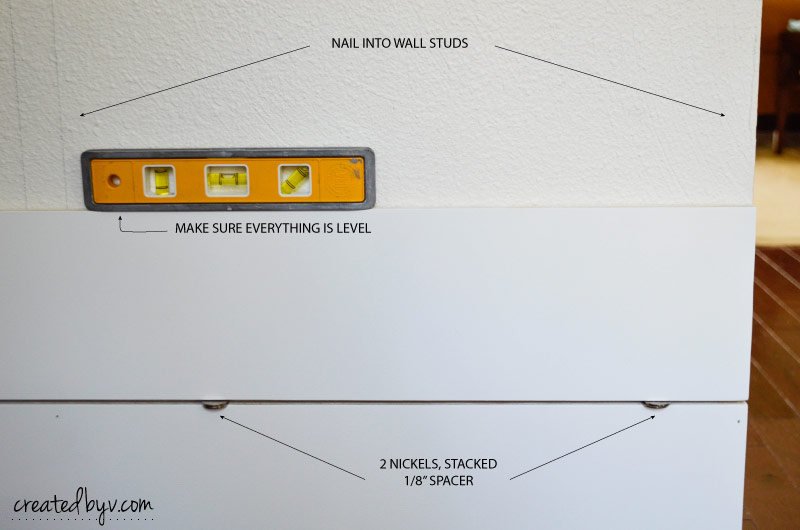
Since I planned to cover the length of the wall, I knew there would be studs in each corner. With the help of an electronic stud finder, I located and marked the studs in the middle of the wall as well. By nailing through the drywall and into studs, the planks are kept tight and flush against the wall and there is no need for adhesive like Liquid Nails.
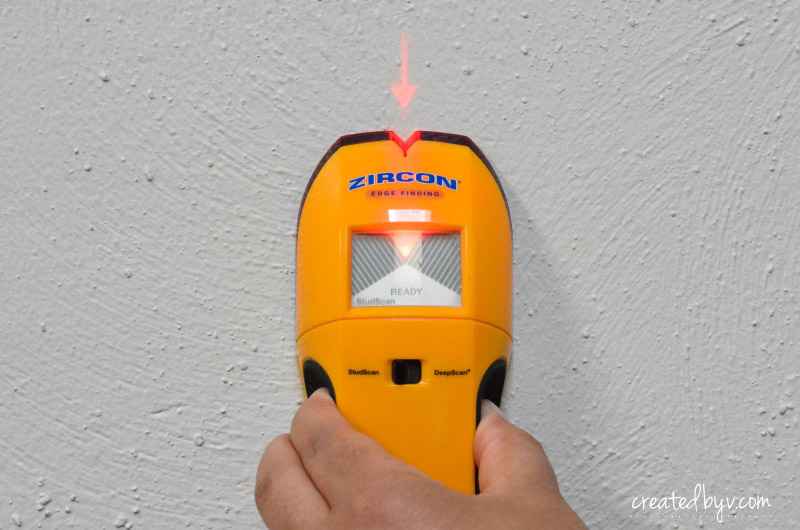
Check out This Old House’s video for tips on locating studs as well as types of stud finders.
For my first wall, I drew lines all along the wall to mark the studs. (See #1 above.) Very quickly, I realized I could just mark the studs for the bottom board and shoot nails in the same vertical line going forward.
3. Measure and cut.
Lowe’s helpfully ripped the plywood sheets into 6″ boards. I then cut the boards to length with a miter saw. Since walls are not perfectly square, I measured and cut each board as I went along — working from the bottom up and numbering the back to keep them in order.
4. Paint planks (and trim).
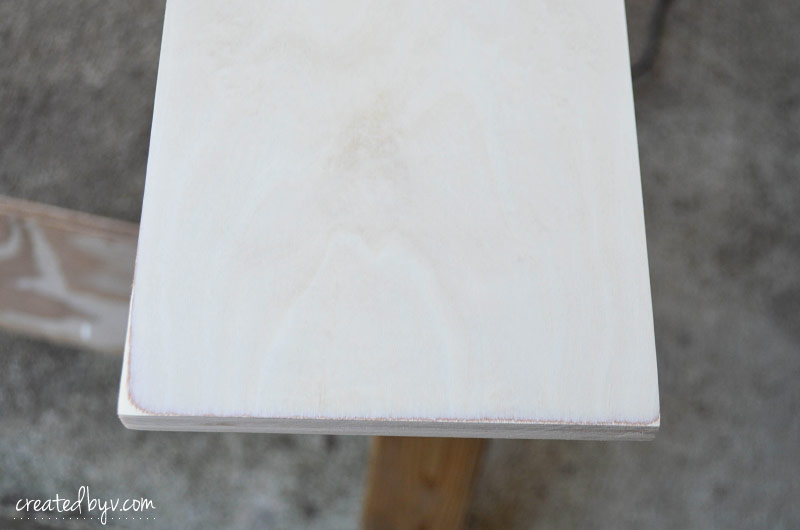
The plywood I chose was already primed on one side so after the boards were cut to the proper lengths, I gave them a light sanding to prepare for paint. Try not to get too aggressive when sanding plywood or else you may damage the veneer — see below where I sanded through the veneer along the edges.
I painted the boards prior to installation because I didn’t want to risk muddying up the gaps with multiple coats of paint. I’ve seen that particular paint flaw on other shiplap walls, especially tongue-and-groove paneling, and I sought to avoid it while still giving the boards full coverage. (Plus, it’s far better to sand outdoors to fix any mistakes than to bring all that dust into the house!)
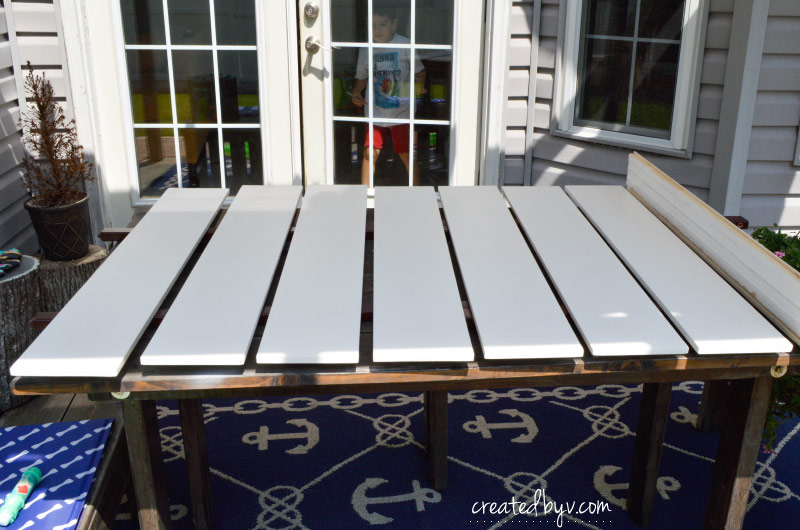
The boards and trim received 2-3 coats of paint before installation and a final coat after filling nail holes. I found painting up and down with a roller to be the most effective way to keep paint out of the gaps. In the few instances it occurred, I used a metal scraper to clear it while the paint was still wet.
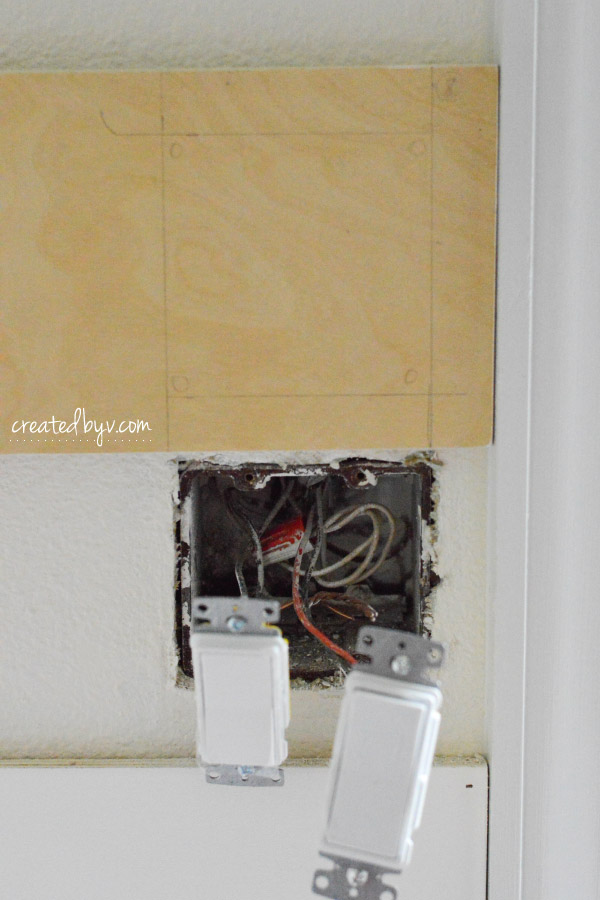
5. Account for outlets and switches.
In the entryway, I had to account for one light switch, that was conveniently situated within a 6″ board, and one outlet that overlapped two boards. Here’s how:
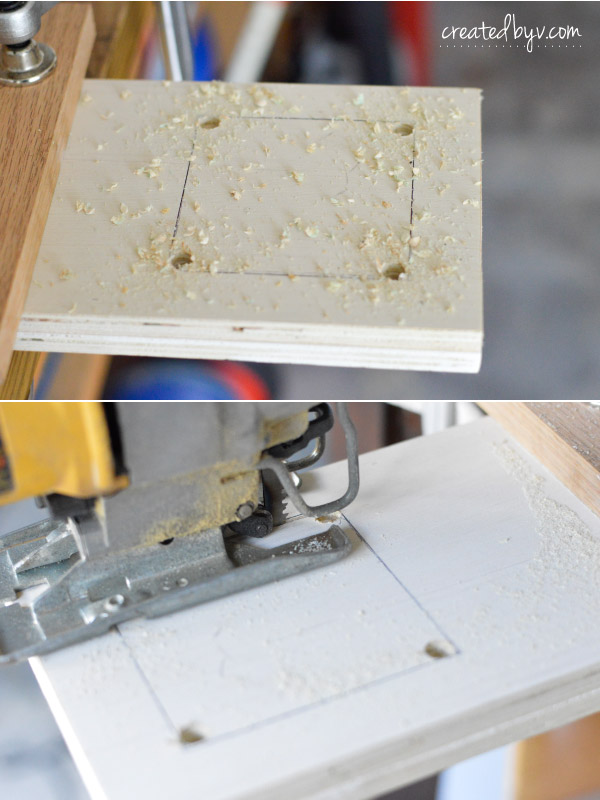
(a) Be sure to turn off the circuits you’re working on from the electrical panel. Remove the cover plate and mark the box on the board(s). I made a pencil mark to outline the box and drew straight lines with a speed square.
(b) Drill holes wide enough for a jigsaw blade to drop into at the corners of the box. Cut along the lines with the jigsaw; discard the cut-out square and sand inner edges.
(c) Install the board(s) first per #6 below. Then insert box extender(s) per package directions. The package should also include longer screws necessary to reattach the device.
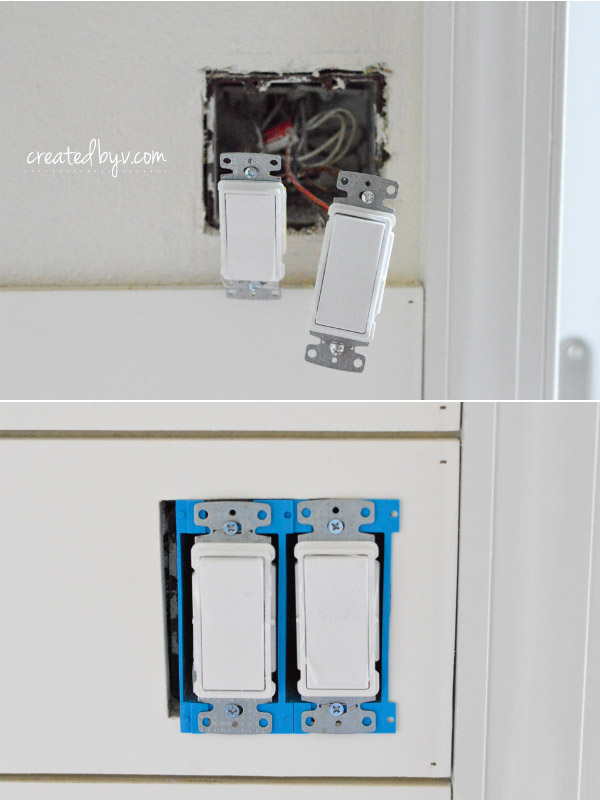
(d) Replace the cover plate and you’re all set!
Here’s a look at the outlet that required cuts in two boards.
6. Install boards.
I installed the boards with 1 1/2″ brads using a pneumatic nailer. I kept the existing baseboards and started by nailing the first board level along the bottom.
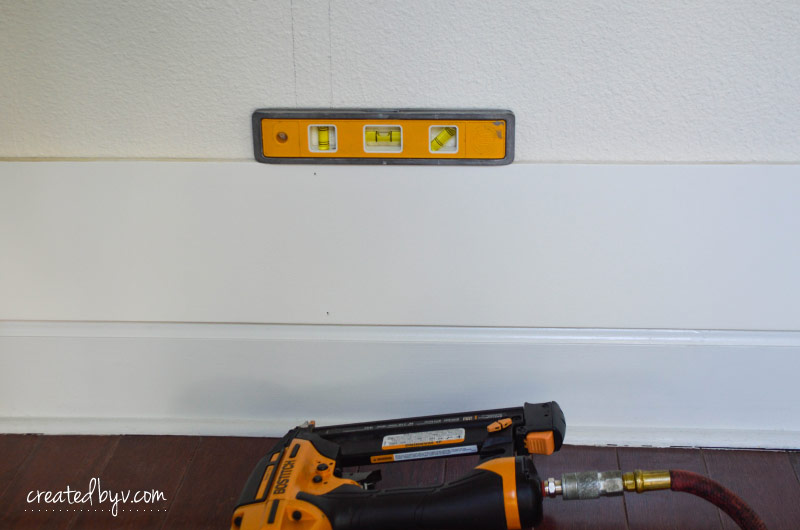
I then stacked two nickels for a 1/8″ spacer and nailed the next board in place. Repeat.
“Level” is the key word. Make sure the first board is level and then double-check as you work your way up because a small error at board 2 compounds significantly by board 10.
In one instance, the baseboard runs from laminate flooring to carpet so one end is higher than the other. For that wall, the first board sits slightly above the baseboard but is level. I promise you, no one is going to notice that tiny gap at the underside of your shiplap, but they will most certainly notice wonky lines!
For a clean and polished look, I filled the nail holes with wood filler. Once that dried, I lightly sanded it, wiped the walls clean and touched up with paint.
Here’s a tip: If you’re painting your shiplap white, use white wood filler for easier cover-up.
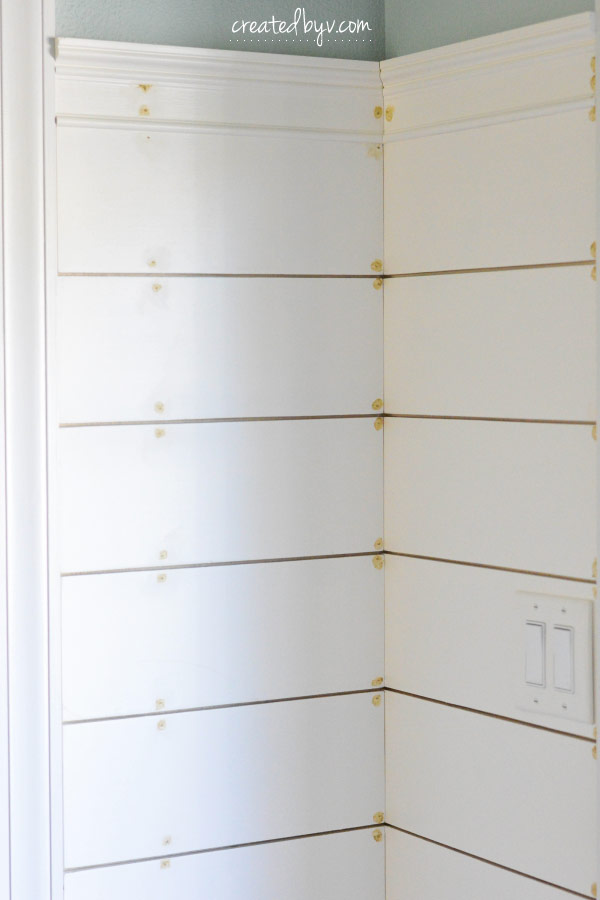
7. Add trim, optional.
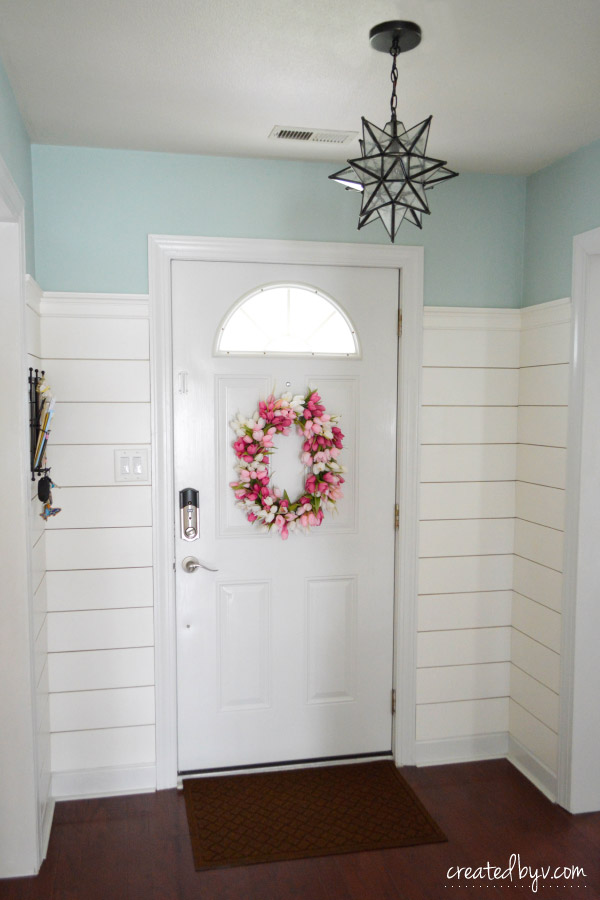
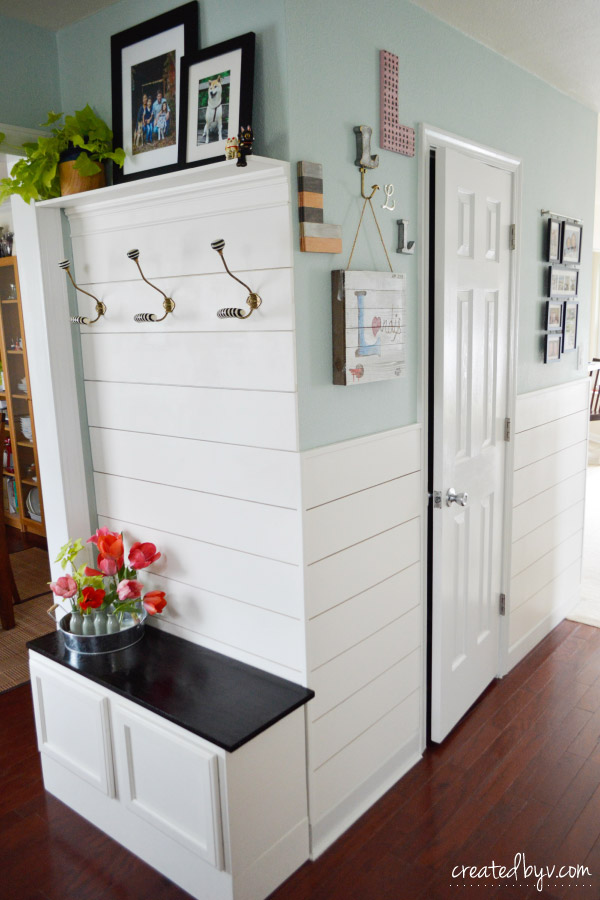
As you can see, I didn’t shiplap all the way to the ceiling. Instead, I planked three-quarters of the walls around the entryway and halfway up the adjoining hallway. A big part of that choice was so I could also paint the space a soft, airy color — Benjamin Moore’s Palladian Blue — for a casual, coastal feel.
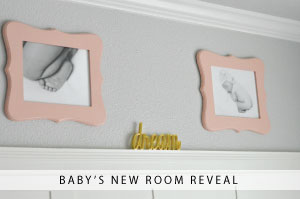
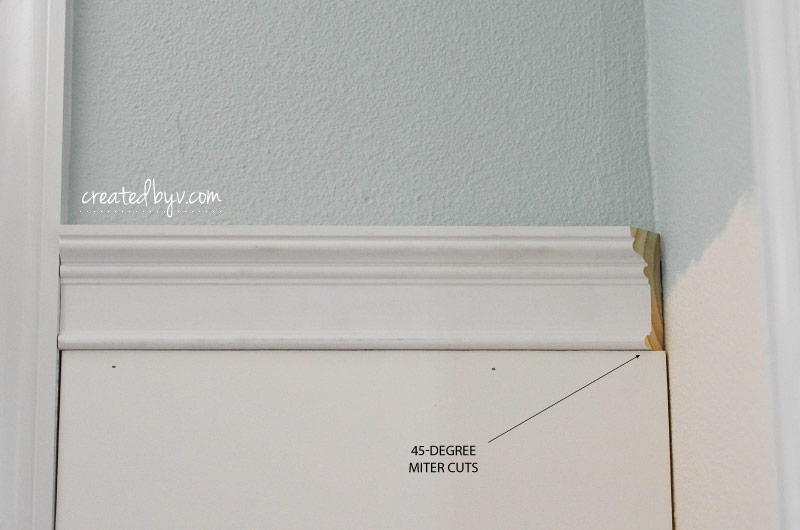
ENTRYWAY TRIM: In our initial entryway project with Lowe’s, I topped the shiplap wall with a shelf for photos and knick knacks. I used the same chair rail (without the shelf) to cap the other walls within the entryway. The moulding was cut at 45-degree angles on the miter saw to join and fit nicely into the corners. It was installed the same way as the planks: nails driven into wall studs.
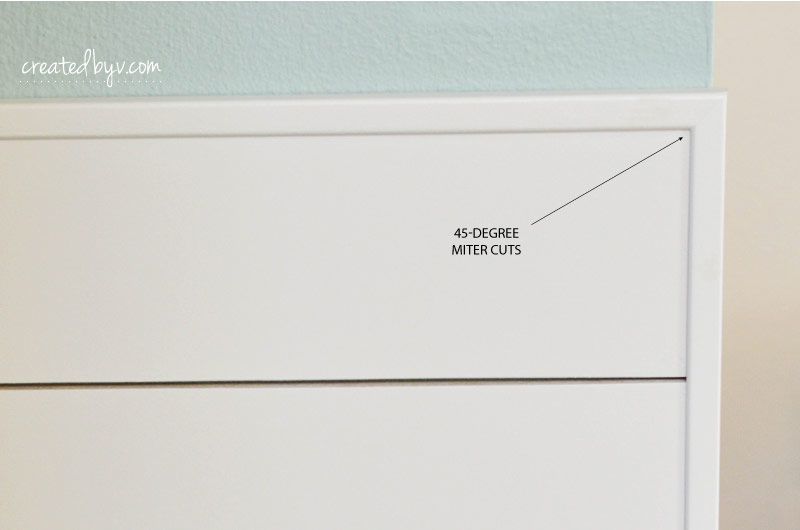
HALLWAY TRIM: The hallway was an afterthought to transition from the entryway. For this trim, I used simple, straight corner guards that neatly encase the shiplap. Again, 45-degree miter cuts were made to join the pieces, and it was installed with nails into studs.
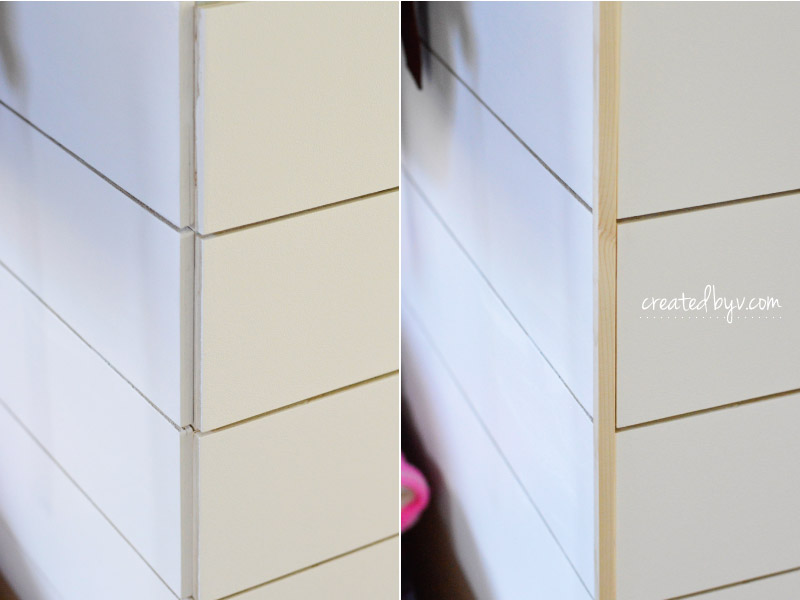
Except for this one… since the hallway was done later, there wasn’t anything to nail this piece of trim. Enter stage right, my brilliant husband, who made a perfect solution with a piece of scrap wood and a planer. The filler piece was nailed to the shiplap and the trim was nailed to the filler piece.
I love it when things come together and I love how this project turned out.
I’ll share the finishing touches to our entryway once the weather cooperates and I’m able to get the front door painted. In the meantime, do you have a space that’s screaming for shiplap? Let me know what you think in the comments below. Thanks for reading! — v.